BlueStacks is one of the most popular Android emulators for Windows, used by gamers to play titles like Call of Duty: Mobile, Gentian Impact, and Summoners War. But when your BlueStacks is running slow, it can ruin the gaming experience. Whether you’re facing FPS drops, input lag, or delayed screen response, this guide will show you how to fix lag in BlueStacks step by step. With each section, we’ll move closer to a permanent fix for lag in BlueStacks, helping you to enjoy smooth, stutter-free gameplay. We’ll also talk about how I optimized my system personally using these methods.
How to Fix Lag in BlueStacks
If you’ve noticed BlueStacks lagging, the problem usually comes from system settings, outdated drivers, or overloaded CPU and RAM. BlueStacks slow on PC often occurs when virtualization is disabled, background apps consume memory, or your graphics driver is outdated. Other issues include the use of integrated graphics, poor DirectX settings, or older versions of Windows. You’ll need to tweak several settings at both system and emulator levels. This guide will help you optimize BlueStacks for gaming by targeting all these possible causes.
How I Fixed Lag in BlueStacks
When I first installed BlueStacks on my Intel i5 laptop with 8GB RAM and an SSD, I expected flawless gameplay. But instead, games like The Tower: Idle Tower Defence and Diablo Immortal were lagging badly. After deep troubleshooting, I realized multiple things were wrong: virtualization wasn’t enabled in BIOS, the system was in balanced power mode, and my graphics driver was outdated. By following the steps below, I turned my slow BlueStacks into a smooth emulator that could handle high-frame-rate games with ease.
How to Fix BlueStacks Lagging (permanently)
To fix BlueStacks lag permanently, the approach has to be both broad and technical. You can’t rely on just one setting. You’ll need to tackle the emulator performance from different angles: hardware-level adjustments, Windows configuration, and in-app optimization. Each fix is explained in simple language, and you can expect to see better FPS, lower input lag, and improved frame rendering.
Fix 1: Graphics Driver Update
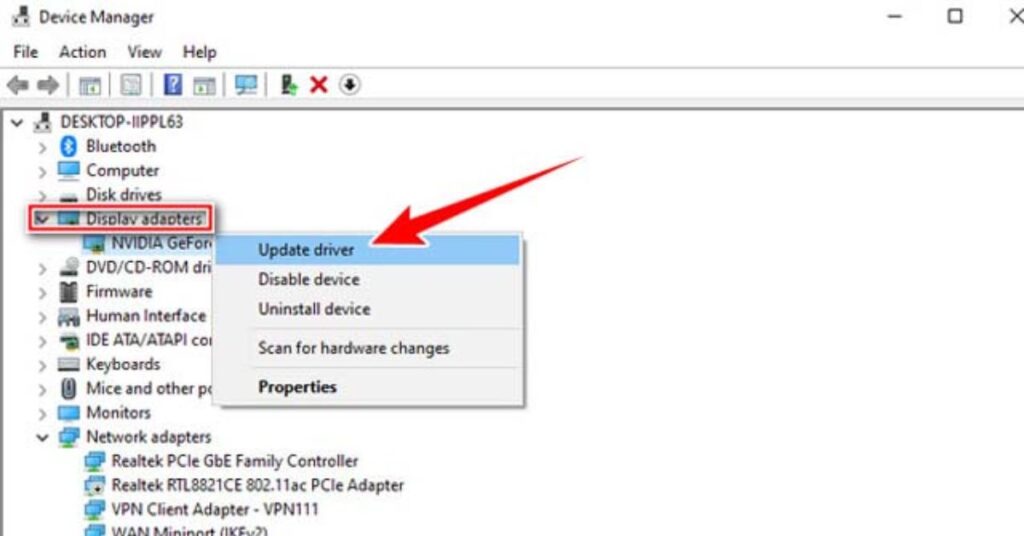
Outdated drivers are a major reason for FPS drops and graphics stutter. To boost BlueStacks performance instantly, always install the newest graphics driver from your hardware manufacturer. Both Intel HD/UHD, AMD, and NVIDIA RTX cards regularly release updates that fix performance bugs and add support for new rendering engines.
Download the Latest GPU Drivers
| Brand | Driver Download Page |
| NVIDIA | https://www.nvidia.com/Download/index.aspx |
| AMD | https://www.amd.com/en/support |
| Intel | https://www.intel.com/content/www/us/en/support.html |
Make sure to uninstall previous versions using Display Driver Uninstaller (DDU) before installing the latest one.
Fix 2: BIOS/UEFI Update
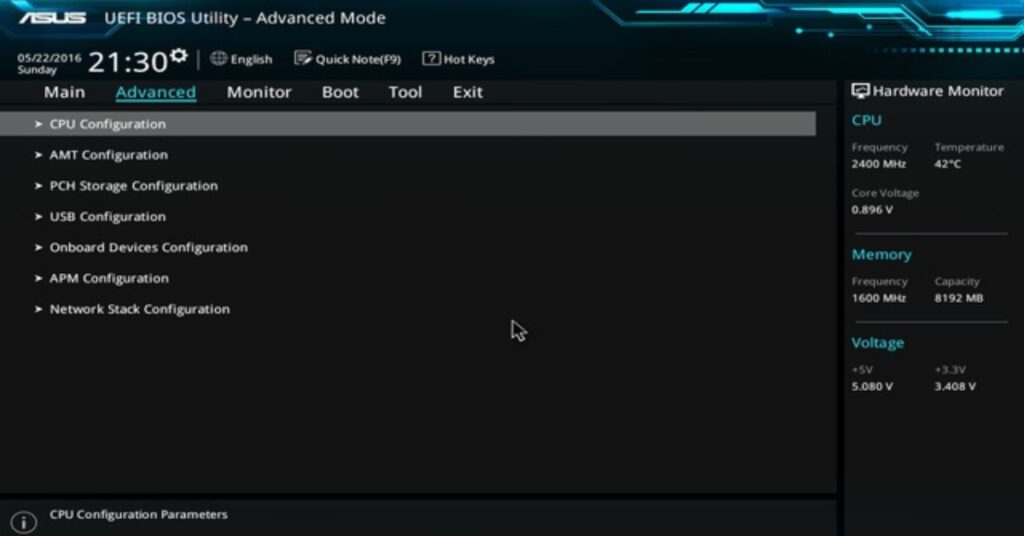
Your system’s BIOS controls how your hardware talks to your OS. A BIOS/UEFI update can unlock features like Intel VT-x or AMD-V, which are essential for Android emulator performance. Visit your motherboard or laptop manufacturer’s site, check for the latest version, and carefully follow the update process. Always back up your data before applying BIOS updates.
Fix 3: Power Settings
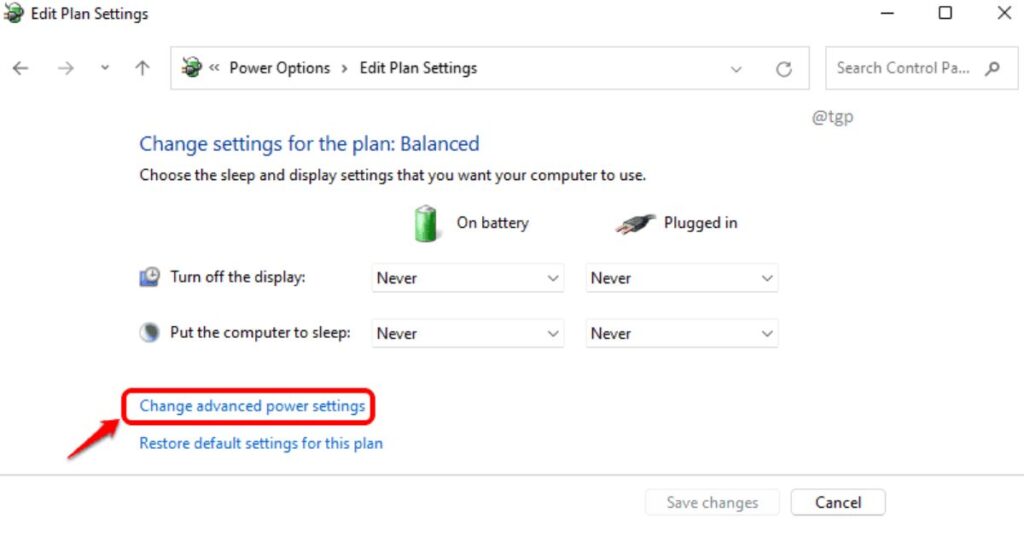
Windows often uses a “Balanced” plan that saves battery by reducing performance. This affects how much power goes to BlueStacks and your GPU.
How to Enable High-Performance Mode
To unlock full system potential, go to Control Panel > Power Options > Select High Performance. If it’s not visible, create a custom power plan. This boosts CPU clock speeds and prioritizes performance over power saving, especially important for desktops and plugged-in laptops.
Fix 4: Background Processes
Many users don’t realize that apps running in the background—like browsers, update checkers, or messaging apps—can take up system memory.
How to Close Background Apps in Task Manager
Press Ctrl + Shift + Esc to open the Task Manager. Go to the “Processes” tab and end tasks like Chrome, Microsoft Teams, or OneDrive that aren’t needed during gaming. You can also disable startup programs by going to the Startup tab and disabling unnecessary ones.
Fix 5: Compatibility Mode
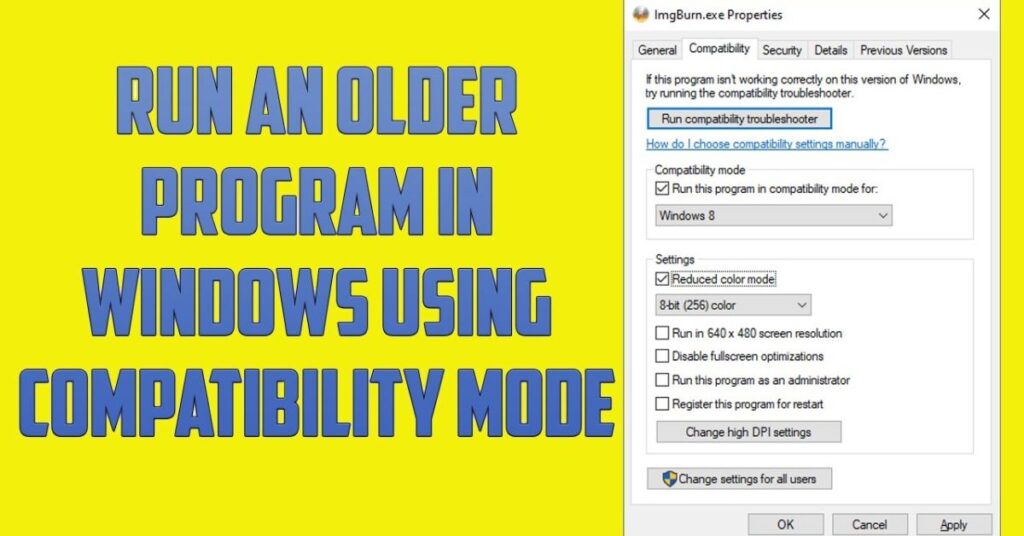
If you are using BlueStacks 5 on Windows 10 or 11, running it in Compatibility Mode for an earlier version of Windows (like Windows 8) can resolve certain performance issues. Right-click the BlueStacks shortcut > Properties > Compatibility tab > Check “Run this program in compatibility mode.”
Fix 6: Disable Full-Screen Optimization
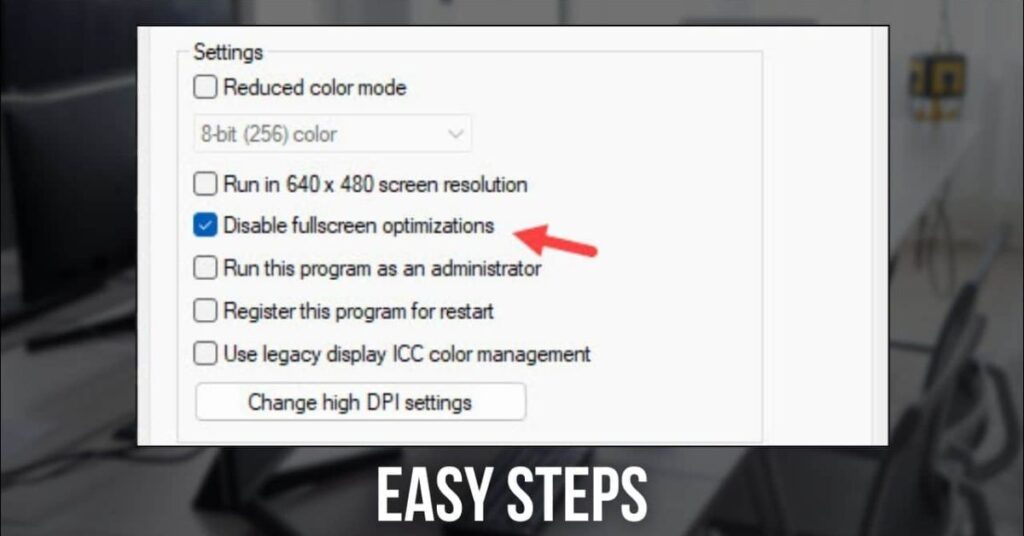
Windows often applies full-screen optimization to games and apps, which can sometimes conflict with emulators.
How to Disable Full-Screen Optimization
Right-click the BlueStacks icon > Properties > Compatibility tab > Check “Disable fullscreen optimizations.” Then click Apply. This disables Windows’ built-in optimization layer that can reduce frame rates.
Fix 7: Check for Game Updates

If the games you play in BlueStacks are outdated, they may not work properly.
How to Update Your Games
Open the Play Store inside BlueStacks. Go to My Apps & Games > Updates. Tap “Update All.” Ensure auto-updates are turned on for better game performance optimization.
Fix 8: System File Checker (SFC)
Corrupted Windows system files can cause general slowdowns across all apps, including BlueStacks. Run the System File Checker by typing sfc /scannow in Command Prompt (admin mode). Let the scan finish and repair damaged files. This can remove any hidden lags introduced by Windows itself.
Fix 9: Disk Cleanup
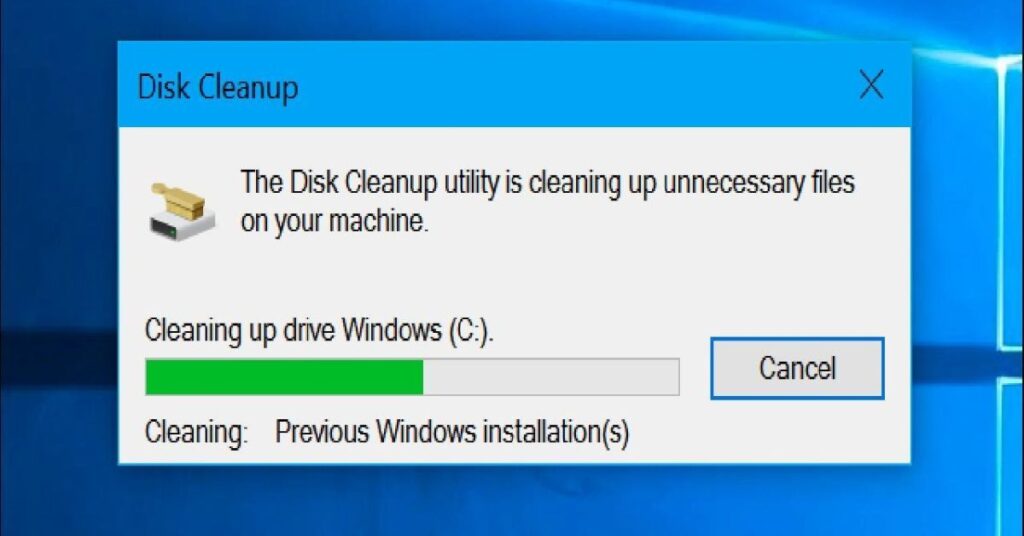
Over time, your system collects junk files that clog up memory and storage. Use Disk Cleanup or Storage Sense to remove temporary files, thumbnails, and unnecessary system logs. You can also defragment your drive if you’re not using an SSD.
Fix 10: Virtualization Technology
One of the most important steps to reduce BlueStacks lag is enabling virtualization. Without it, BlueStacks will struggle to use your CPU efficiently.
Before & After Impact
| Feature | Virtualization OFF | Virtualization ON |
| CPU Usage | High | Balanced |
| Average FPS | 30 FPS | 60+ FPS |
| Input Response | Slow | Fast |
How to Enable Virtualization in BIOS
Restart your PC and enter BIOS (usually by pressing F2, Delete, or Esc during boot). Find Intel VT-x or AMD-V in CPU settings and enable it. Save and exit. Once enabled, BlueStacks will have better access to processing power.
Fix 11: Check for Overheating
If your PC is overheating, your CPU and GPU will throttle to lower temperatures, reducing performance. Download HWMonitor or CoreTemp to monitor heat levels. If temps go above 85°C, clean your fans, apply new thermal paste, or get a cooling pad for laptops.
Fix 12: Antivirus Exclusion

Some antivirus programs scan BlueStacks processes and slow them down. To fix this, add BlueStacks to your antivirus exclusion list. For Windows Defender, go to Settings > Update & Security > Windows Security > Virus & Threat Protection > Manage Settings > Add or Remove Exclusions. Add the entire BlueStacks folder here.
Identifying the Root Cause of Lag
To know what’s truly causing the problem, monitor Task Manager during gameplay. Is CPU usage spiking? Is RAM maxing out? Are you seeing constant disk usage at 100%? Tools like MSINFO32 and Resource Monitor can help you dig deeper. Once you identify whether it’s the GPU, CPU, or memory, the above fixes can be applied with more precision.
Optimizing BlueStacks Settings
Inside the emulator, you can fine-tune performance settings that directly affect gameplay.
Step 1: Allocate More RAM and CPU Cores To BlueStacks
Go to Settings > Performance > Adjust the slider to use more RAM (4GB minimum) and 4 CPU cores if available.
Step 2: Adjust Frame Rate and Resolution
Lowering resolution to 1280×720 and setting frame rate to 60 FPS can make a big difference, especially on integrated graphics systems.
Step 3: Enable Virtualization
If you missed this earlier, go back and check your BIOS settings to ensure virtualization is enabled.
Step 4: Disable Graphics Intensive Features
In Engine settings, turn off ASTC texture and High Performance Graphics Mode unless you’re on a dedicated GPU like RTX 4070.
Step 5: Switch to Legacy Mode
Legacy Mode in the graphics engine settings helps in cases where DirectX or OpenGL cause rendering issues. Try switching and test performance.
Managing System Resources for Reducing BlueStacks Lag
A clean, lean operating system performs better with emulators. Uninstall unused software, update all system drivers, disable visual effects in Windows, and use tools like MSConfig to disable unnecessary services. Set paging file size manually, use an SSD over an HDD, and always ensure your dedicated GPU is used instead of integrated graphics for BlueStacks.
Troubleshooting Persistent Lag
If the lag still doesn’t go away, consider reinstalling BlueStacks. Try an older version like BlueStacks 4 if your system can’t handle the newer one. You may also test LD Player or NOx Player for comparison. Lastly, reach out to BlueStacks support with your PC specs—they may provide optimized settings for your configuration.
May Also Read: How to Fix Bluetooth Audio Delay Android: The Complete 2025 Guide
FAQ’s
How to fix laggy BlueStacks?
Close background apps, lower graphics settings, and enable performance mode in BlueStacks settings.
How to reduce lag in an emulator?
Allocate more RAM/CPU, use performance mode, and disable unnecessary emulator features.
How much RAM do BlueStacks need?
BlueStacks needs at least 4GB RAM, but 8GB or more is recommended for smooth performance.
How to fix lag in Free Fire BlueStacks?
Set BlueStacks to high performance, lower in-game graphics, and enable virtualization.
How to fix lag fast?
Restart your PC, close background apps, and switch to performance mode for quick lag fixes.
Conclusion
Now you know how to fix lag in BlueStacks using real-world methods that target system, software, and emulator-level issues. Whether it’s by updating your GPU driver, enabling virtualization technology, or switching to high-performance mode, each fix can significantly improve your experience. If you’re tired of BlueStacks running slow, this guide gives you everything you need to optimize BlueStacks permanently for smoother gameplay. The steps above helped me eliminate lag completely, and they can do the same for you.